Moving an Avatar Using a Sample App
In the next step, let's import the Unity Plugin package file (sample program) into Unity and try making an avatar move using the sample app.
- Advance Preparations
- STEP 1: Start the project
- STEP 2: Import the Unity Plugin
- STEP 3: Start the sample app
- STEP 4: Validate the sample app
Reference
With the sample app, you can capture the motion data sent from the mocopi app via UDP and move an avatar. Deepen your image of Unity Plugin applications and implementation methods by understanding the sample app operation.
Advance Preparations
Prepare to use the sample app using the following procedure.
- Connect the PC (Windows/Mac) on which Unity is installed to the local network.
- Access the Downloads page and download the latest version of the Unity Plugin.
- Extract the downloaded ZIP file to any folder.
For details about the distributed data, refer to Content of the distributed data. - Connect the smartphone on which the mocopi app is installed to the local network.
-
Refer to Sending Data from a mocopi App for the state in which motion data can be sent using UDP from a mocopi app.
Specify the IP address of the PC on which Unity is installed in the "IP" field, the port number (initial value: 12351) to use in the "Port" field, and "mocopi (UDP)" as the send format.
The advance preparations are now complete.
STEP 1: Start the project
Creating a new project
- Start the Unity Hub and click the [New project] button.
-
Click to select the "3D" Core.
Caution
The sample app only supports SRP (Built-in Render Pipeline).
- Configure the necessary settings in the project settings and click the [Create project] button.
The new project is now created and can be started.
When using an existing project
- Start the Unity Hub and click the project to use from the Project list.
The project is now started.
STEP 2: Import the Unity Plugin
- Click [Assets]>[Import Package]>[Custom Package...] in that order from the Unity Editor menu bar.
The Import Package window appears. - Choose the package file (mocopi-receiver-plugin_vX.X.X.unitypackage) in the folder specified for the extraction destination in Step 3 of the Advance Preparations and click the [Open] button.
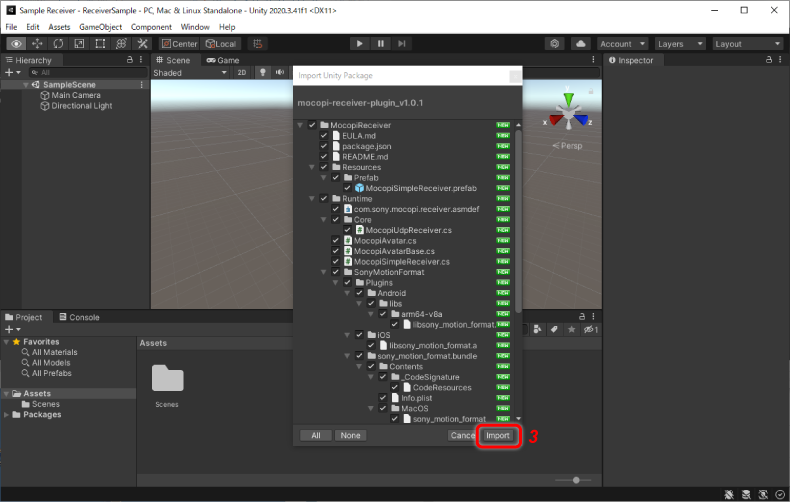
The Import Unity Package dialog box appears. -
Click the [Import] button.
The package file is imported into "Assets."
- Open [Assets]>[MocopiReceiver]>[Samples]>[ReceiverSample]>[Scenes] in that order in the left pane of the Project window.
-
Double-click [ReceiverSample].
The sample app scene appears in the Scene window.

The Unity Plugin is now imported.
STEP 3: Start the sample app
-
Click the [Play] button at the top of the Unity Editor.
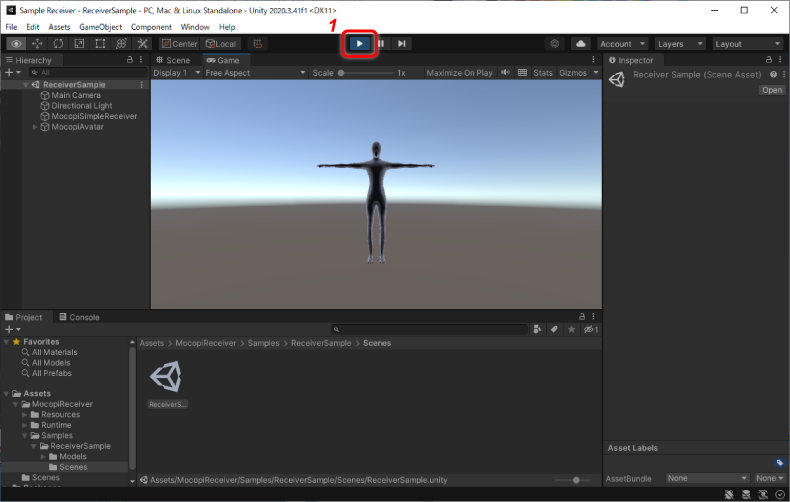
The sample app is now started.
STEP 4: Validate the sample app
- Operate the mocopi app to start the UDP transmission of the motion data.
- Check that the avatar moves according to the sensor movements.
The sample app is now validated.
Caution
If the sample app avatar does not move, the data may not be received via UDP. Refer to Troubleshooting.